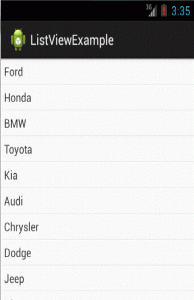
Android ListView Example

What is a ListView?
A ListView in Android is a scrollable list where you fill it with items. You used Adapters to provide data into the ListView object. Data content can be pulled from an array or database. It can be any types.
Below is a simple example of how to create a ListView in Android and an custom ArrayAdapter example
Simple ListView Example
1. Create a new Android Application project in Eclipse and name it ListViewExampleActivity
2. Click on the “MainActivity.java” or if you named “ListViewExampleActivity.java” file inside the SRC folder.
3. Extend the class if Eclipse hasn’t extended it already
e.g.
public class ListViewExampleActivity extends ListActivity {
4. Press Ctrl+Shift+o in Eclipse so that it imports all the required classes and files for the project. This to me is the most useful command in Eclipse.
5. Create a new Android XML Layout file in the “res/layout” folder and name it “list_cars.xml“. You can right-click on the “res/layout” folder and choose “New–>Others–>Android–>Android XML Layout file“. Name it “list_cars.xml“. Copy the below code and replace the code in the file.
<?xml version=”1.0″ encoding=”utf-8″?>
<TextView xmlns:android=”http://schemas.android.com/apk/res/android”
android:layout_width=”fill_parent”
android:layout_height=”fill_parent”
android:padding=”5dp”
android:textSize=”15sp” >
</TextView>
6. Go back to the main activity page “ListViewExampleActivity” page and add the following codes to it
public class ListViewExampleActivity extends ListActivity {
//create a string array variable that contain the list of cars brand
static final String[] CARS= new String[] { “Ford”, “Honda”, “BMW”,
“Toyota”, “Kia”, “Audi”, “Chrysler”, “Dodge”,
“Jeep”, “Nissan”, “Mercedes-Benz”, “Subaru”, “Volvo” };
@Override
public void onCreate(Bundle savedInstanceState) {
super.onCreate(savedInstanceState);
//link the string array variable to the list layout file
setListAdapter(new ArrayAdapter<String>(this, R.layout.list_cars,CARS));
//add the text to the listview
ListView listView = getListView();
listView.setTextFilterEnabled(true);
//create an onItemclickListener to detect item clicking from the list
listView.setOnItemClickListener(new OnItemClickListener() {
@Override
public void onItemClick(AdapterView<?> parent, View view, int position, long id) {
// When clicked, show a toast with the selected item
Toast.makeText(getApplicationContext(), ((TextView) view).getText(), Toast.LENGTH_SHORT).show();
}
}); //setOnItemClickListener
} //onCreate
}
Custom ListView Example
To create a custom ListView, you will need to create a custom ArrayAdapter and a new Android XML Layout file.
* We will use the same project as above and modify it to use custom ArrayAdapter instead.
1. Let us modify the “list_cars.xml” file. Copy and paste the following code and replace it.
<?xml version=”1.0″ encoding=”utf-8″?>
<LinearLayout xmlns:android=”http://schemas.android.com/apk/res/android”
android:layout_width=”wrap_content”
android:layout_height=”wrap_content”
android:padding=”5dp” >
<TextView
android:id=”@+id/label1″
android:layout_width=”wrap_content”
android:layout_height=”wrap_content”
android:text=”@+id/label1″
android:textSize=”15px” >
</TextView>
</LinearLayout>
2. Create a new class file for the custom ArrayAdapter. Right click on the “src/{your project name}/” folder and choose “New–>Class” and put in “customListViewAdapter“.
public class customListViewAdapter extends ArrayAdapter<String> {
private final Context context;
private final String[] values;
public customListViewAdapter(Context context, String[] values) {
super(context, R.layout.list_cars, values);
this.context = context;
this.values = values;
}
@Override
public View getView(int position, View convertView, ViewGroup parent) {
LayoutInflater inflater = (LayoutInflater) context
.getSystemService(Context.LAYOUT_INFLATER_SERVICE);
View rowView = inflater.inflate(R.layout.list_cars, parent, false);
TextView textView = (TextView) rowView.findViewById(R.id.label1);
textView.setText(values[position]);
return rowView;
}
}
3. Now with the new custom Adapter and layout file created, we can bind them on our Main Activity page.
Copy and replace the following code
@Override
public void onCreate(Bundle savedInstanceState) {
super.onCreate(savedInstanceState);
setListAdapter(new customListViewAdapter(this, CARS));
}
@Override
protected void onListItemClick(ListView l, View v, int position, long id) {
//display selected items to the screen
String value = (String) getListAdapter().getItem(position);
Toast.makeText(this, value, Toast.LENGTH_SHORT).show();
}
4. Press Ctrl+Shift+o in Eclipse so that it imports all the required classes and files for the project.
5. That’s it.
